Wednesday, June 29, 2016

Man cave progress

We started work in the man cave and I am really loving the progress. We did make some changes to the original plan which, If you remember, looked like this:


But after much thought we decided that it wasn't really necessary to purchase another sofa for this room when we have a perfectly good love seat down stairs that we would be otherwise giving away [the sofa is falling apart, read more about it here] so we switched it up and came up with this design instead...

The first thing we did was to paint. I knew I wanted a dark accent wall or two and we decided on Valspar's Crucible in an eggshell finish. Its a pretty grey blue and goes well with our style. We finished the other walls in the same color as the downstairs: Valspar Frappe.


Then, I had Zack build me a rustic desk in the odd little nook of the room so that I could get my crappy Target desk out of our room.


Its a lot more spacious than my other desk and much more my style, so now Ill have a place to design without being cramped.


 I'm really happy with the room so far and pretty much all we have to do now is add furniture and accessories. Till next time!

xoxo,
Jackie

Black Doors

I have been eyeing all these amazing bloggers with black doors and I really really wanted to do it myself but I wasn't sure what my landlord would think. I mean, black doors are a huge commitment, once its done its not going back. Finally, one day I just texted him saying "How would you feel if all the doors in your house were black?" and I attached a couple pics of my inspiration...

My favorite blogger, Jenna Sue Design has black doors all over her house, click here for more pics

or this one.... lovee
To my surprise, he wrote back, "Looks interesting, go for it!" I was shocked but didn't want to ask questions so I went to Walmart and picked up a can of Glidden High Endurance grab-n-go paint in Onyx Black [satin/eggshell finish], a paint brush and a trim roller. As soon as I got home I started on the first door...


I'm not going to give a full tutorial because there's a ton on Pinterest you can follow but all I did was removed the knobs and left the door attached, brushed on two coats in the border areas, then rolled two coats over the whole door. I didn't seal them or anything and so far they are holding up great. Here's the kitchen doors....


 And the entryway doors ...


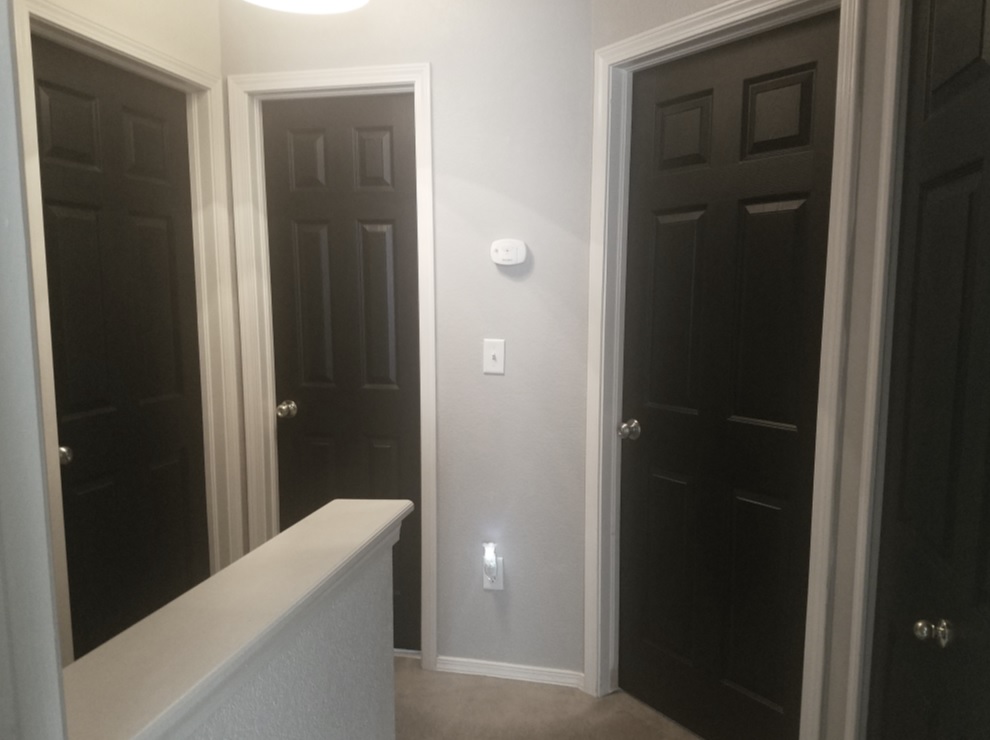
The upstairs doors....


And a little before and after.


What a difference its made! I am in love with them and I know you might think they darken a space but honestly I don't feel like they do. They look so rich and custom. Definitely another step to making this house our home. Next on my list is replacing all those gold knobs! Yuck! Who ever thought gold was a good idea? Till next time!

xoxo, 
Jackie 

Wednesday, June 22, 2016

Guest Bathroom Refresh

Since Kelsey moved out we decided it was time to change up the guest bathroom a little. I didnt want to spend much and really didnt want to have to paint since I already have so much painting going on right now [more on that in another post] so I decided to just change up a few key pieces and throw in some new accessories. Heres how it looked the day Kelsey moved out.


And heres how it looks now.


I purchased this shower curtain and this matching towel from Target, added some glass jars and a jute rug [not seen in the picture] from At Home and a floral arrangement that used to be on my dining table. It was an easy and cheap makeover that made all the difference, and now there's one less room to worry about!

xoxo,
Jackie

Friday, June 17, 2016

Minneapolis inspiration

I just got back from a work trip in Minneapolis and I gathered so much inspiration that I just had to share. I'm not a big traveler, and I dont think I have ever stayed in a fancy hotel so this was all new to me and I was just taking in every little detail of this beautiful place. We stayed in the JW Marriott in the Mall of America and it was just gorgeous. There was so much pattern and texture and glitz, it was amazing. If I had to describe the style Id call it masculine glam. Leather and dark bronze and beige mixed with marble and chrome. It was a style I havent seen before and I was just in love! Heres a few pictures from their website which you can find here.


Basically this is exactly what our room looked like, just flopped. It was heaven for 4 days. Heres some of my pictures.


 The one thing, well there were a ton of things I loved but, the major one was the textured walls. Not a single wall was just painted. They used this awesome wallpaper that looked like tile and, one of my person favorites, grascloth. I never would have thought to put it together in one room but somehow all the pattern and texture just worked.


On our last day we had a cocktail party at this awesome venue, Aria in downtown Minneapolis. If I was a millionaire I would buy this place and make it my house! Exposed brick walls, gauzy curtains and chandeliers galore! This place is what I imagine heave looks like. I wasnt able to capture great photos of my own since I just had my phone and it was dark due to the party but heres a couple I found online...

photo found here 

click here for original source

And here are some that I took.... 


 You can visit their website here for more awesome photos.

Have you been anywhere lately that gave you unexpected inspiration? Tell me all about it in the comments! Until next time !

xoxo,
Jackie


Monday, June 6, 2016

Master Bedroom Reveal : Phase I

We finally finished our  master bedroom and I am loving it! It took a lot of changes and some quick DIY but we are DONE. I don't think I've ever fully finished a room so I am so excited to share with you all the hard work we put in this last month so I'm going to just jump right in. First, let me take you back to what we started with originally...
when we first moved in

about a week ago
 We started things off with a new duvet. We have a queen sized bed but the Ikea queen sized duvet we had previously was just too small. Zack and I were in constant battle at night and I couldn't take it anymore. Originally we were going to just buy another of the same but I feel like the Ikea one is overplayed now and I didn't want the same thing as everyone else. So, we were walking around Target in Apple Valley and I saw this one and I fell in love. It keeps with the same style as the other one but is much lighter and has a little bit of a different style on the pillows and around the opening for the comforter. I waited for it to go on sale for memorial day and I snagged a king size for just $75. Then we grabbed this affordable down alternative comforter from Target to fill it. We are so in love. Its so fluffy and big! No more freezing at night for me !


So after we got the duvet squared away I was searching for a nice, simple rug and ran across this one at Target, it was also on sale for memorial day and after a little google search for a coupon code it was an additional $5 off so I snagged it for just $60. It has a subtle chevron pattern and is just the perfect shade of beige to really bring out the headboard and linen pillows. Definitely a great purchase.


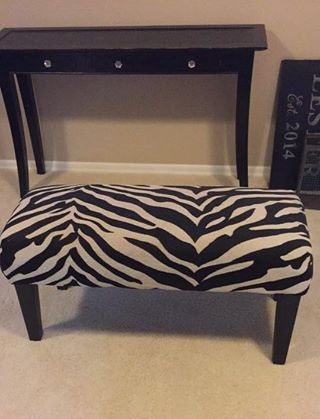
The other piece that we grabbed was for more purpose than just pretty. One of our pups, Soko, is getting older and is having some back problems and can no longer jump onto the bed, she will try but cant make it anymore and it was really making me feel bad. She doesn't sleep with us every night [shes the independent type] so we discussed just making her sleep in her own bed from now on but our other pup sleeps with us nightly and we wanted Soko to have the option too, so we settled on a bench. Its lower to the ground and easier for her to jump on to make it to the bed, added bonus that its cute. I grabbed it off craigslist for just $20. It still had the original sticker from Kirklands for $129.99 and a "clearance" sticker for $99.99, but it was hideous. Here's the pic from the ad.


The legs were chipped and scratched and the fabric was dingy and worn. Totally worth the money though because I was able to easily sand down and re-stain the legs [with sandpaper and stain from my stash] and for $10 in fabric I was able to recover it, added some leftover nail head trim from another project last year and voila! A brand new bench for $30. Cant even build one for that price.


The last item on our list was the nightstands. We chose the Ikea Tarva three drawer dressers for added storage. I have seen so many tutorials on Pinterest where people made theses dressers over so I knew Zack and I could customize them to our taste easily. They are $79.99 at Ikea and worth every penny. [you can get yours here] This is how it looked after assembly.


Then we added lath pieces [found in the fencing isle at Home Depot $0.52 each].


Finally we stained with my go to stain: Minwax English Chestnut and finished with a whitewash. These are by far my favorite thing in the room.
*For a tutorial on how to get this finish click here .


And heres how it all came together.


I am so thrilled that we were able to wrap up this phase of the room so now we can finally move onto the man cave!

xoxo,
Jackie

Monday, May 16, 2016

DIY rustic wood sign

I have seen some really pretty rustic signs on Pinterest and Instagram lately and I really want one. Most of the prices on these signs are pretty reasonable but I already had some metal letters I bought while we were in California and I knew I wanted to incorporate them somehow so I figured I might as well make my own. Here's what I ended up with.


I really like it and if you do too here's how I did it...

Supplies:

1- 1"x16"x 36" board
3- 1"x2"x4" boards
saw [i used a jigsaw]
screws
drill [or you could use a nail gun if you have one]
stain
old washcloth
white paint
gloves
paint pen [or chalk marker]
pencil or pen
printed quote
2 saw tooth hangers


the first thing I did was to cut the two side pieces. I laid the 1x2x4 against the side of the 1x16x36 and marked where it met the edge and cut it with my jigsaw.


Then I placed both side pieces down and placed another 1x2x4 across the top and marked where it met the edge of the other 1x2 and cut that with my jigsaw. Repeat on the bottom until you have all four pieces cut like so.


Next, I attached the 1x2s with screws on the edges and 1 in the center [2 in the center of the top and bottom] and it should look something like this when its all attached...


Now you can stain! I wear gloves and use and old washcloth for this part but you can use a mens sock or really what ever works for you. I chose Minwax English Chestnut for this project and just put on one coat and then wiped away immediately.


I always whitewash my wood so that it looks more weathered and rustic but if you dont want to just skip this step. To whitewash, mix 2 tblsp white paint [whatever you have] with 1/4c water. I use the same washcloth I used to stain and dip it right into the paint/water and rub it into the wood. It creates a hazy effect that I love.


When it dries it will look something like this...


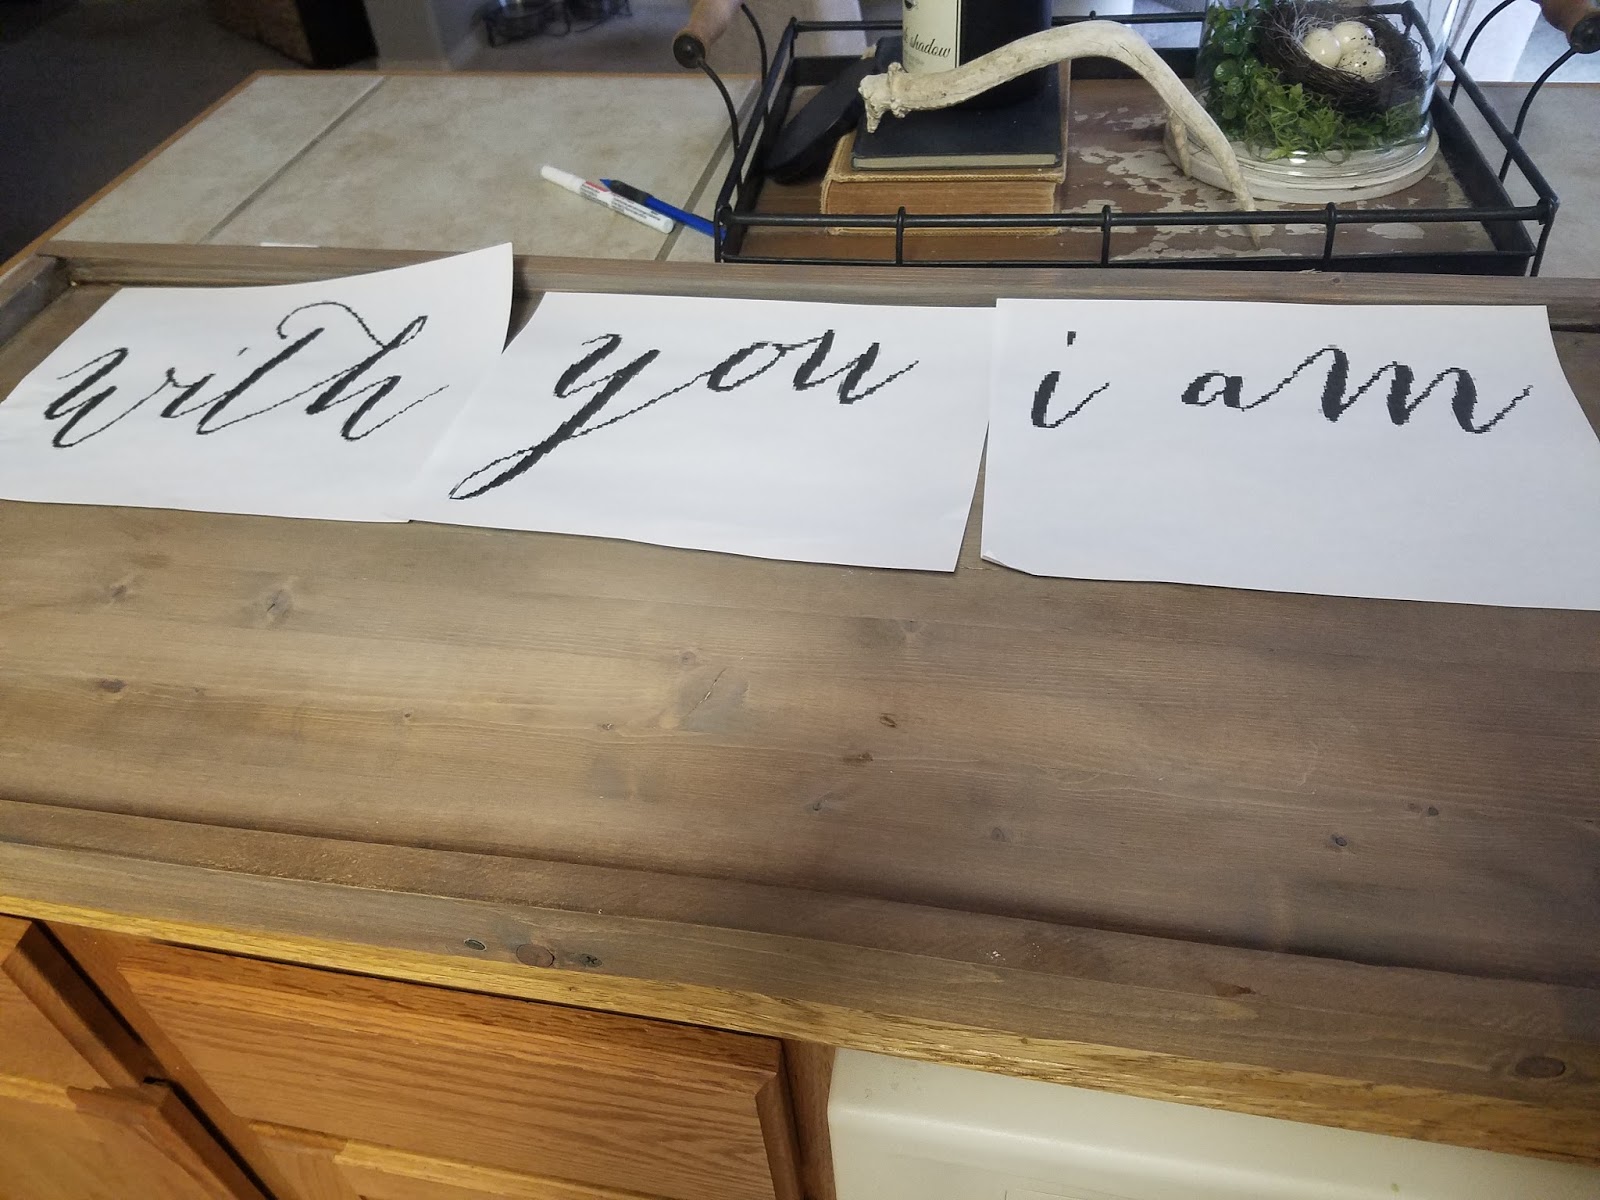
After that your sign is technically done and you can stop here if you dont want to add the quote. If you DO want to add a quote the next thing you should do is print your quote out and arrange it on the sign.


Trim it and tape it into place.


Now, take a pencil or pen and trace the quote pushing down hard to create and indent in the wood. It should look like this.


Now, you can take your paint pen [or chalk marker] and trace over your indent and fill it in.
*I had issues here as my paint markers werent showing up at ALL, so I grabbed my chalk marker and it worked beautifully, or you could use a sharpie if you wanted to*


Add the saw tooth hangers to the back and Viola! You're done! I added the galvanized letters to mine but you could paint the entire quote if you wanted. Thanks for following along!


xoxo,
Jackie