Wednesday, March 14, 2018

Boho Makeover Reveal: Downstairs

Final reveal is here for the entire downstairs. Its a big one. You ready? Okay, lets go!

Entry Before...

Farmhouse...

After...

Dining Before..

Farmhouse...

Now...


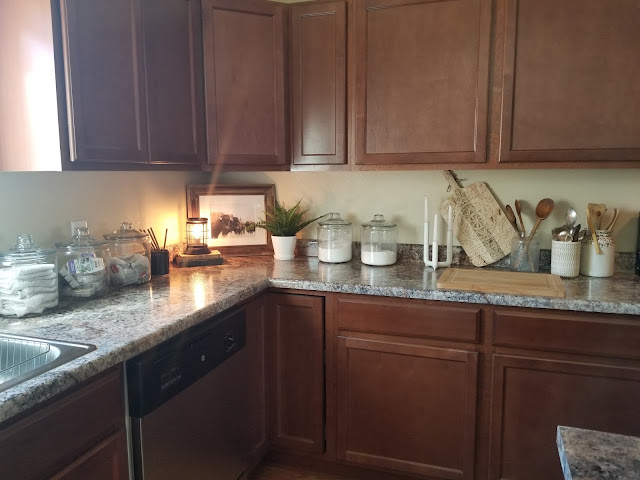
Kitchen Before...

Farmhouse...


After...


Stairs Before...

Farmhouse...

After...

Living room Before...

Farmhouse...

After...


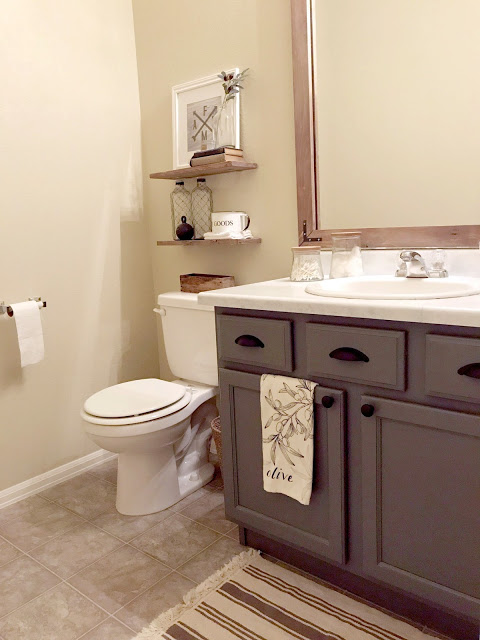
Half bath Before...

Farmhouse...

After...

Garage entry Before...

Farmhouse...

After...

Tuesday, March 13, 2018

DIY: Privacy Glass

I'm not sure what person thought of glass front doors but let me just say... they were an idiot. I'm sorry, but they were. I don't know anyone in my neighborhood, yet, there are always people knocking on my door. Usually after dark too. I don't want to answer my door to weirdos but with a glass front door you cant really see who it is without them seeing you looking at them. Talk about awkward! I finally got sick of it and decided to fix it.

I've known about this method for a while through research on Pinterest but if I had know just how easy it was I would have done it the day I moved in. Here's how it works.

I picked up this box at Home Depot for $22 and it fit my window perfectly with very little waste.


All you have to do is measure the window and cut the film to down with a sharp blade.


Now, clean the window really well. After you get everything off of it you'll want to spray it and leave it wet. This helps slide the film into place.


Peel off the backing and stick the film onto the window. Slide it around until its in place.


Finally, use an old credit card [or in our case a Safeway club card] to push the air bubbles and Windex to the edges where you'll want to wipe it off with a paper towel.


All done!

Check out the difference.


And it doesn't change the look too much outside and yet, no one can look in! Win win!


---Jackie

Wednesday, March 7, 2018

DIY Oak Table Makeover

My mama has had her dining table for a few years now. It was pretty unattractive when she first got it


but then she paid a woman re-do it for her to be a little more shabby chic. When she got it back we did a little makeover of the space by adding the shelves and chandelier and ended up with this...


  • It turned out cute, but honestly it wasn't functional for her. The chairs sat really low and my mama is already short. Not to mention, the table itself was large and the chairs couldn't push all the way in so it took up a lot of space that her small apartment couldn't really accommodate. After living with it this way for a couple years, she decided to make a change. She sold her set and started looking for new, affordable options. I mentioned that I was hoping to get rid of my dining chairs and she gladly took them off my hands. The last piece was a table. She knew she wanted a smaller pedestal table so she kept a lookout on the Facebook Marketplace for the right one. It didn't take long! After a couple days a solid oak pedestal table WITH a leaf popped up for only $25! After messaging the seller and negotiating delivery (across town and up 40 stairs) she ended up paying $50 total. Absolute steal! The gentleman delivered it the next day and we came up with a plan to make it fit her style better. Originally, she wanted it painted all white, but I convinced her to do a white base with a wood top


To get the look we wanted we needed to sand down the original finish to the raw wood. This proved to be easy with both of us running our sanders at the same time with 50 grit paper.


Once the stripping was done we ran over it quickly with 120 grit paper to smooth everything out. Then, the staining began. We used an old rag with some Minwax English Chestnut stain.


After, we soaked our rag in water, dipped into white paint and did a quick white wash over the stain.


We let it dry for less than half an hour before bringing it inside and painting 2 coats of white paint onto the base.


I tried to convince her to leave it like this but she really wanted to distress it. To achieve that I used 120 grit paper on my mouse sander and ran over the edges and curves to create a worn look.


After adding in her "new" chairs and moving around some decor we ended up with this....


I'm not really into the super girly look but this dining room has my heart! Its my favorite part of her apartment now. Just goes to show that with very little money and a lot of hard work you can really change the whole look of a space.

---Jackie

For more pictures of my mama's apartment click here.

Boho Makeover Reveal: Loft, Guest Room/bath

Back again for another makeover reveal, this week we're touring the rest of the upstairs, starting with the loft. This room was so hard for me to re-do because I really loved the way it looked already but also because we never use this room so I didnt want to spend alot. I'm so glad i went for it though cause it truly turned out so much better than before. Take a look...

Before...


Farmhouse...


Now...


The guest room was so much fun to makeover, though i was sad to have to sell the desks because they were so unique but it just wasnt doing it for me anymore, this makeover however, does.

Before...

Farmhouse...

Now...


The guest bath didnt change much, just some towels and plants but its definitely feeling a lot more boho these days too.

Before...

Farmhouse...

Now...

Next week is the big downstairs reveal so stay tuned!

---Jackie